Export and import apps
In Flowfinity, you can export and import applications with ease.
Note: For details on how to only import an application, skip to Step 3.
➤ Learn more about Flowfinity No-Code Platform.
Example
An application developer uses CloudDev, a sandbox server, to build and test applications. Once the application is ready to be deployed to end-users, the application must be exported and then imported into Flowfinity Actions.
Instructions
Export Applications
- Navigate to the appropriate site within your Flowfinity sandbox server. To export multiple applications at the same time, select 'Export Apps' button below the listed applications.
Note: To export a single application, you can also select an individual app from the list and then click 'Export.'
- To export all apps, check the 'Select all Apps' box. Alternatively, check the appropriate applications from the list. Click 'Next.'

- If your selected applications include any dependent applications, these apps will be automatically included in the FTF file. Confirm the selected apps and click 'Next.'
Note: This step helps highlight when an exported application relies on additional apps to function correctly. However, you can choose to deselect dependent apps if desired.
- Review the selected application(s) and click 'Export apps.'

Import Applications
- Go to Flowfinity Actions, on your production server, and select the desired site.
- Click Configure, and the Apps tab will open automatically.
- Click 'Import Apps.'

- Click 'Choose file' and select the appropriate application FTF file. Click 'Next.'

- Review and select which application(s) to import. Then click 'Next.'

- Review your selection and then click 'Import apps.'

- The application(s) will now be listed in the Apps tab. Draft applications are clearly marked, helping you differentiate between existing published applications.

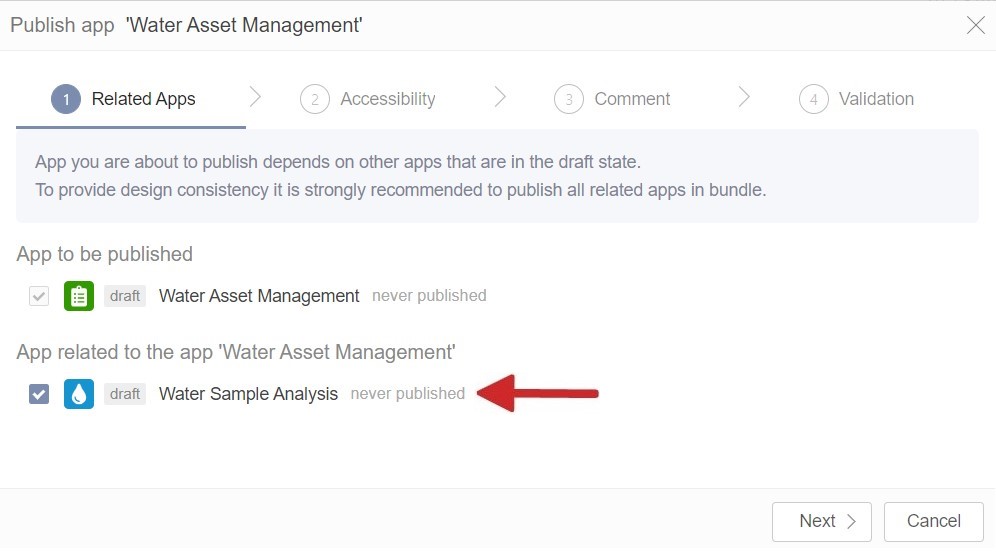
- Click a draft application and select 'Publish' from the dropdown list.
Note: To amend the application before publishing, select 'Customize' and make the necessary changes within the Application Editor. Publish the application when ready.
- If the selected application has any dependencies, the dependent draft app will also be automatically selected for publishing. Review the selection and click 'Next.'

- Create a new tab or select an existing tab for the application(s). Click 'Next.'

Note: If the imported application contains a Task or Escalation, then a Robot user must be assigned to the application during an additional step. See below.
- Add a publication comment if necessary, then click 'Next.'

- The application(s) are subject to a validation check, with any errors or inconsistencies clearly displayed. If the applications are valid, then click 'Publish.'

- The applications are now published and ready for use.

- Repeat Steps 12 to 16 for each remaining draft application that has been imported.
